You know that saying “be careful what you wish for”? Last year, I asked for clipless mountain bike shoes and pedals for my birthday. Ripping off the ribbons and tearing the wrapping paper, I saw an amazing-looking pair of shoes and shiny, high-tech pedals. And a little baggie of unidentifiable screws and bolts. And an instruction manual so long and complicated, I almost gagged.
What did I know about installing the cleats in the shoes? Nothing, obviously.
What do you need to know to install SPD cleats in mountain bike shoes? As it turns out, not much! Installing SPD cleats in your shoes is easy. Here’s everything you need to know about installing your cleats so you’re ready to ride on clipless mountain bike pedals!
What is an SPD Cleat?
An SPD cleat is a clip that attaches cycling shoes to bicycle pedals in a clip-in or clipless pedal setup. “SPD” stands for “Shimano Pedaling Dynamics,” and the term is usually used to refer to any of Shimano’s mountain bike pedal systems.

Tools Needed for Installing SPD Cleats
While the instruction manual from Shimano lists dozens of tools needed to install or adjust SPD cleats, I’ve only found two of them necessary:
- 4mm Hex Wrench for attaching the SPD cleat in the shoe
- 4mm hex torque wrench for tightening the SPD cleats
The remainder of the manufacturer-recommended tools may be for other pedal systems or for adjustments that are much more complicated than we’ll address in this article. But, for your reference, the other tools Shimano recommends are:
- 3 mm hexagon wrench
- 8 mm hexagon wrench
- 7 mm spanner
- 8 mm spanner
- 10 mm spanner
- 17 mm spanner
- Screwdriver
- Hexoglubular #15
- TL-PD33
- TL-PD40
- TL-PD63
MTB Tools I Love and Recommend

I own each of these tools and only recommend things I own and use.
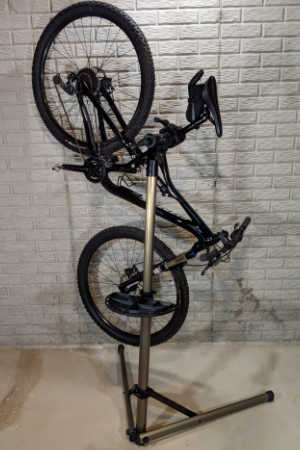
- Bike Hand Bike Repair Stand. Nice mountain bikes don’t have a kick stand so keeping your MTB safe but conveniently stored is essential. I keep my bike on my stand whenever I’m not riding it. This makes it easy to lube the chain, inflate the tires and adjust the derailleur. Highly recommended – Bike Hand Bike Repair Stand (👈 Link to Amazon to see what thousands of others have said)
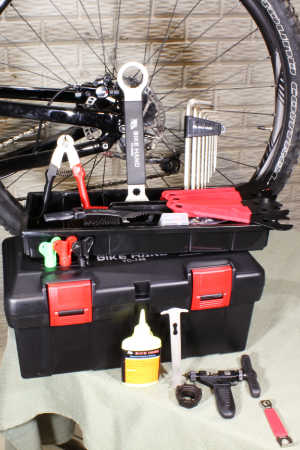
- A basic MTB toolbox for replacing a chain, adjusting brakes and dialing in the fit. Bike Hand has a 37-piece box that has most of the specialty bike tools to keep your MTB properly maintained. The Bike Hand brand is value packed for the avid rider. Check out the competitive prices with this link to Amazon 👉 Bike Hand 37 pcs Bike Repair Tool Kit
- Get a good air pressure gauge, if you get just a tiny bit serious about MTBing you’re going to start playing with tire pressure. A couple psi can make your tires sticking or not. Get a good gauge, I highly recommend the Topeak Smartgauge D2, it’s accurate, flexible and easy to use. An Amazon best seller, here’s a link 👉 Topeak Smartgauge D2
- Carry a multitool with you on every ride. I’m serious, most of the time you can MacGyver something to get back to the trailhead if you have a multitool. I’ve got the Crank Brothers M19, it’s worn, rubbed and abused – but it still works. Thousands sold on Amazon – check it out with this link 👉 Crank Brothers M19
Step by Step Instructions for Installing SPD Cleats
Now that you have your cycling shoes, the cleats and hardware and your tools, you’re ready to install the cleats.
- The cleat is the semi-triangular piece with two holes in it. Line it up on the bottom of the shoe so that the rounded end is toward the toe part of the shoe and the blunt, square shape is toward the heel.
- On the bottom of the shoes, you’ll usually see two sets of parallel holes that can slide up and down a small amount. The slide lets you have some customization in where you want the cleat on the bottom of the shoe. This corresponds with where, on the bottom of your foot, you’ll feel the most pressure while pedaling. Where you choose to position the cleat depends on your personal preference and any physical challenges you’re working with. Remember, you can readjust this at any time, so if you try it out and experience pain in the arch of your foot or metatarsal, try a different position.
- When you’ve chosen the location you want the cleat to be fastened on the bottom of your shoe, lay the two-holed washer over the holes you’ve selected.
- Use your hex wrench to tighten the screws as tight as you can.
- Set your torque wrench to 4 to 5 NM and ratchet it until it clicks.
- Voila! SPDs installed

Hiking Shoes For Mountain Biking? (Let’s Find Out)
Can I use hiking shoes for mountain biking? Everyone knows how durable hiking shoes are….

Should My Feet Touch the Ground on a Mountain Bike
One of the most significant settings on a mountain bike is seat height. While it…

12 Reasons Why Mountain Bike Shoes Are The Best
Whether riding clipless or flat pedal, mountain bike shoes on your feet are the best…

How to Install SPD Cleats on Mountain Bike Shoes [Step by Step with Video]
You know that saying “be careful what you wish for”? Last year, I asked for…

Can I Use Mountain Bike Shoes on a Road Bike?
Cycling can feel like such a complicated and expensive sport. There is equipment and accessories…
How Do SPD Cleats Work?
A clipless pedal system with SPD cleats offers numerous benefits to your riding:
- Stable pedaling platform without worry about your foot slipping off the pedals
- Easy entrance and exit from the clip (once you get the hang of it!)
- Mud shedding. Obviously, on a mountain bike ride, there are times when you need to walk, and the shape of the cleat is designed to minimize getting mud or dirt packed in the mechanism.
- Additionally, mountain bike shoes have a much more rigid sole than ordinary shoes, which distributes the force of your pedaling more evenly throughout your foot and give you more power with the pedal stroke.
If you’re still uncertain about whether to use clipless pedals, read DIY Mountain Bike’s article explaining the pros and cons of each pedal system.
To “enter” the cleat, you’ll position your shoe on the pedal so the cleat is lined up with the clip on the pedal and press firmly down until you feel the clip engage. To get “out” of the pedals, twist your heel away from the bike frame to release the cleat.
It’ll take some practice to get confident and quick at getting in and out of the pedals. I recommend balancing on your bike with a hand on the wall to hold you up. Then, repeat the maneuver again and again on each side until you feel good about it.

ROCKBROS MTB Pedals Review: Why Cyclists Are Switching
Having equipped three of my bikes with ROCKBROS MTB Pedals, I’ve come to see them…

Do Bike Pedals Require A Pedal Wrench?
I always need help to loosen up my pedals during bike maintenance. I try using…

Should You Pedal When Shifting Gears on a Bike (Smooth Shifting)
You need to pedal when shifting, but it’s best to ease up on the pressure…

Will Mountain Bike Pedals Fit Road Bike Cranks Arms? We Find Out!
Looking to change up the feel of your road bike? Changing the pedals from clipless…

9 Universal Mountain Bike Pedals You Need to See
Okay, let’s get one thing straight – bicycle pedals for your mountain bike are not…

Can I Get Bigger Pedals for My Mountain Bike?
A bigger pedal gives a mountain biker added confidence when jumping and also provides more…
How Do You Adjust SPD Cleats for More or Less Gripping Force?
Once you’ve installed your SPD cleats in your mountain bike shoes and practiced enough to get comfortable, take a few easy rides to get acquainted with your new pedal system. You may find that it takes so much effort to release the pedal from the cleat that you can’t do it quickly – even with all your practice. You might want to adjust the cleat for less gripping.
Conversely, if you’re riding along and the clips release at random times you don’t intend, then you probably want more gripping power in the cleat.
You make those adjustments by adding pins or spacers on the pedal. Pins on the pedals provide grip with the bottom of the shoe. The more pins you have, the more grip. Also, longer pins grip better than shorter pins. So, to make your pedals grip better, add additional pins, or take spacers out of existing pins (so that they’re longer).
If you want less grip, shorten the pins by removing spacers or removing the pins entirely.
The Shimano instruction manual can be a great reference for installing and adjusting SPD cleats.
Can You Put SPD Cleats on Road Cycling Shoes
You can install SPD cleats on road cycling shoes. In fact, many spin bikes require this setup.
Basically, the cleats need to be compatible with the pedals, not with any particular shoes. While some mountain biking shoes include a generic SPD cleat in the box, most of the time the cleats come with the pedals. Check out the instructions above for how to install your SPD cleats in road cycling shoes.
Will SPD Cleats Fit on Crank Brother Pedals
The answer to this is unequivocally: No.
DIY Mountain Bike strongly recommends against doing this. While an SPD cleat will snap into a Crank Brothers pedal, it won’t release correctly or reliably. You could find yourself in a situation when you need to snap out quickly and instead find your feet stuck fast to the pedals. On a narrow hillside trail or at a traffic light, this could mean a serious injury. At the very least, it’ll mean a sore hipbone and skinned elbow.
Now that you see how easy it is to install and adjust SPD cleats for clipless mountain bike pedals, you won’t have to “be careful what you wish for.” So, go ahead: put clipless pedals on your Christmas list!
Shoes, Socks and Pedals – taking care of your feet riding is critical. Check out the articles below:
- Socks stop blisters and keep your toes warm or cool. Read -> The Best Mountain Biking Socks
- Are you correctly supporting your feet with the right pedals? Check out -> Can I Get Bigger Pedals for My Mountain Bike
- Are you switching from MTB to the Road? -> Can I Use Mountain Bike Shoes on a Road Bike?
- Going to try clipless pedals? Learn -> How to Install SPD Cleats on an MTB Shoe

Professional writer Kat Jahnigen was 2 miles from the nearest village – and roughly 2,310 miles – from the nearest English-speaking town – when her bike tire burst. At that time, she was a college student on a bike trip across the desolate, rocky island of Crete. It suddenly occurred to her that it would’ve been good to learn some basic bike repairs before setting off on a solo bike trip.
Check out Kat’s website WriteHire at writehire.net.