
A lot of athletes I know are travelling for the holidays and are watching their fitness vanish just as quickly as pumpkin pie on Christmas Eve. One of the more dedicated athletes that I coach asked me, “What’s the best way to pack a bike for air travel?”
The best way to pack a bike for air travel is to follow the same list of steps in a strategic order and place it in a bike specific box.
Bike Packing Steps:
- Shift into the hardest gear
- Remove the pedals
- Remove the handlebars and secure
- Remove the seat post
- Remove the wheels
- Put spacers in the brake calipers
- Remove the brake rotors
- Remove and Cushion the Derailleur
- Secure the chain, derailleur, and crank arms
- Pack all of the equipment in the box
Now that you have your checklist, let’s examine the details.

1. Shift Into the Hardest Gear
This step is so simple but so easily forgotten. It’s very important to shift into the hardest gear so that the derailleur is in the smallest position. This prevents damage from happening to your derailleur and makes packing easier in general. It will also make it easier to remove the rear wheel.
It’s critical to do this step first in order to ensure a smooth and professional packing approach. I’ve forgotten this step a few times only to find myself awkwardly shifting a bike without pedals, trying to plug in various wires, and all around looking like I need help.
2. Remove the Pedals

I like to do this step early on because I find that it is easier to find leverage on the pedals when the wheels are still on. Sometimes the pedals can become rather sticky, especially if you don’t remove them often or if you recently completed a wet or muddy ride.
In order to remove your pedals you will need a pedal wrench. There are several ways to remember which direction to turn the wrench. Some pedals, such as Shimano SPDs will actually have an arrow. You can also remember the saying “righty tighty lefty loosey.” Finally, you can think of pushing the wrench toward the rear of the bike.
3. Remove the Handlebars and Secure
Every bike will be a little bit differently. More often than not, you will need to use a 4 mm Allen key to loosen the bolts on the stem. Once removing the bolts and freeing the handlebars from the stem, put the bolts back into their places in the stem so that they are not lost in transport.
Turn the handlebars vertically and secure them on the non-drivetrain side of the bike. Some bike companies make little sleeves to help secure bars but you can also use electrical tape or ties.
If you have a bike with Di2 cables, you will want to use the small Di2 remover tool in order to unplug the cables from the junction box. This is important so that there is not excessive stress on the cables in transport which could result in kinks or tears in the wires. Do not unplug the cables with your hands. The tool is specifically designed to keep the cable in one piece.
4. Remove the Seat Post
You will use an Allen key to loosen the seat post bolt in order to pull the post out of the bike. Loosen the bolt, but do not take it out all of the way. Loosen the bolt only enough that the post can slide out of the frame. After removing the seat post from the bike, tighten the bolt again just enough that it won’t fall out.
If you have a dropper post, then you are in luck. Likely if you have a dropper post, you won’t need to take the seat post out at all. Simply drop the post and pack the bike with the seat in the down position.
5. Remove the Wheels
Now that all of the smaller items are removed from your bike you can remove the wheels. Before removing the wheels ensure that there is a cushioned and open space for you to gently lay your bike down after taking the wheels off. If your derailleur has a clutch, open the clutch so that the derailleur is moveable.
If you have a bike with thru axles, loosen and remove the thru-axle, and allow the wheels to slip out of the frame. After the wheels are removed, replace the thru-axle and allow them to remain in the frame for travel. That way not only will you not lose your thru-axle but it will support the frame.
If you don’t have a thru-axle then unscrew and remove the skewer. Let the wheel slip out and pack the skewers in a safe and protected pocket in your bike bag or box. Don’t allow the skewers to float around the bag, potentially scratching your bike.
Finally, after removing your skewers, place something stiff in between the fork and rear triangle. They make plastic spacers that you can buy and place in the frame or you can fold a piece of cardboard a few times and tape it in-between the frame.
6. Put Spacers In the Brake Calipers
After taking the wheels off, before you do anything else, stop and put a spacer in your brake calipers. If you do not put a spacer in the brake calipers then you risk the brake levers being pressed and the brakes becoming stuck together in transit.
You can buy brake spacers for $2 or probably just ask for some at your local bike shop. If you don’t have time to acquire some, you can gently and carefully place a piece of cardboard in between the brake calipers so that they cannot close on each other in transit.
7. Remove the Brake Rotors

How to Install Bike Brake Pads: Easy Step-by-Step Guide for Rim Brakes
Maintaining your bike’s braking system is crucial for safe riding. Replacing worn-out brake pads is…

Are Cantilever Brakes and V-Brakes Interchangeable?
Cantilever brakes and V-brakes are among the most common braking systems in various bike types….

What are Cantilever Brakes?
Brakes are among the most crucial parts of a bike. This fact applies regardless of…

Cantilever Brakes Vs. V-Brakes (What’s Better)
Cantilever brakes and V-brakes are popular for their considerable tire clearance on bikes. These brakes…

A Guide To Storing a Bike With Hydraulic Brakes
The best way to store a bike with hydraulic brakes is to keep it parallel…

7 Best V Brakes for Mountain Bike
Brakes are one of the essential components of an MTB. They let you halt your…
Not only will removing the brake rotors make it easier to fit your wheels into your bag or box, it will save you a lot of trouble upon arrival. If you remove your brake rotors they are much less likely to be bent in transit. I’m not a professional mechanic, but there is nothing I dislike more than a bent or rubbing rotor.
Depending on what type of rotors and wheels you have will depend on what tools you need. Check your wheels and make sure you have the proper tools prior to packing for travel. This is one of the only tools you can’t make do with something else.
After removing your rotors, place them in a plastic bag with pieces of cardboard separating the rotors. This will not only keep the rotors from bending but will also keep them from clanging together and scratching each other or anything else.
8. Remove and Cushion Your Derailleur
I know a lot of people who don’t remove their derailleur for travel. You can get away with it, but personally, I think you are playing with fire. If you don’t remove your derailleur for transit then you must travel with an extra derailleur hanger (you should anyways). You are much more likely to arrive with a bent hanger if you do not remove your derailleur.
Removing the derailleur is simple. There is usually only one bolt that you will need to loosen or undo. Replace the bolt so that it is safe for travel.
Now that the derailleur is only attached to the bike via the chain, place a towel, bubble wrap or hollowed out Styrofoam block around it to protect the derailleur. I usually secure all of that together with electrical tape.
9. Secure the Chain, Derailleur, and Crank Arms

Before packing everything away, make sure that the crank arm on the drive train side of the bike is facing backward and is inline with the rear triangle. This will save you a lot of pain when packing.
Then secure your cushioned derailleur to the bike frame using electrical tape. You don’t want the derailleur flopping around, hitting the bike, and pulling on the chain. Next, secure the chain with bubble wrap, a chain bag, or simply tape it up toward the frame. You don’t want the chain flapping around and slapping the bike in travel.
10. Pack All of the Equipment In the Bag
How you do this and in what order will largely depend on what bike bag or box you are using. Almost always you will first place the frame in the bag. Strap down everything that you are able to secure. Cushion the bike as much as possible and consider the fact that no one who is handling your bike will think twice before throwing it on its side.
Secure and count all of the extra pieces. Make sure your pedals, rotors, seat post, and anything else you removed are in the box. Do not allow these items to float round in transport. Strap them either to the box or to your bike itself.
Finally, the last item you will place in your box will be the wheels. Make sure to deflate the tires when packing them. They do not need to be completely flat. In fact, I recommend that you do not remove all of the air. If you remove all of the air from your tires your tire is more likely to become unseeded and will give you more work upon arrive.
Since your disassembling many of the parts of your bike, remember to pack them to put everything back together. While your thinking about it read this post on the Ultimate Mountain Bike Tool List.
Remove just enough air from your tires that it makes the wheel an easy fit into your bag/box and so that if they inflate more (which they likely will due to air travel and altitude pressure) they will not explode.
7 Tips To Travelling With A Bike
- What to Cushion Your Bike With
- What Bag Do I Recommend
- Where Can I Get A Box
- How Does BikeFlights Work
- Can You Ship With FedEx or UPS
- What Airlines Can I Fly My Bike
- What Else To Put In Your Bike Bag
- What to Cushion Your Bike With:
The truth is, dismembering and packing your bike is only half the battle. It’s all these little details that will make you a true bike travelling pro.
What to Cushion Your Bike With
I highly recommend using pool noodles. They are inexpensive and do the best job. Simply place a slice in one side of the pool noodle and cut the noodle to the length needed for your frame. Then you can place the noodles to cover the rear triangle, top tube, down tube, fork, seat post, or any other exposed parts of the frame.
Next, I use bubble wrap to wrap up smaller items like the derailleur, brake levers, or anything else I’m worried about. Finally, I place a piece of foam on each side and the top of the box or bag. This gives a bit of extra cushion when the box gets thrown around.
MTB Tools I Love and Recommend

I own each of these tools and only recommend things I own and use.
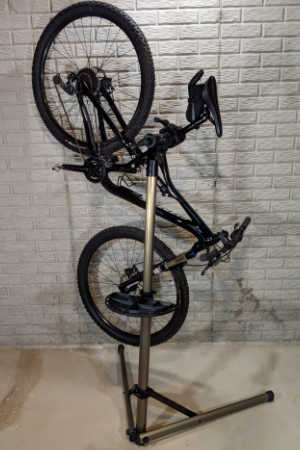
- Bike Hand Bike Repair Stand. Nice mountain bikes don’t have a kick stand so keeping your MTB safe but conveniently stored is essential. I keep my bike on my stand whenever I’m not riding it. This makes it easy to lube the chain, inflate the tires and adjust the derailleur. Highly recommended – Bike Hand Bike Repair Stand (👈 Link to Amazon to see what thousands of others have said)
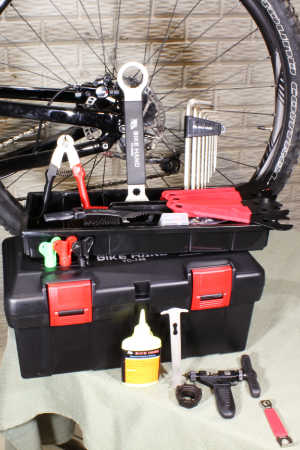
- A basic MTB toolbox for replacing a chain, adjusting brakes and dialing in the fit. Bike Hand has a 37-piece box that has most of the specialty bike tools to keep your MTB properly maintained. The Bike Hand brand is value packed for the avid rider. Check out the competitive prices with this link to Amazon 👉 Bike Hand 37 pcs Bike Repair Tool Kit
- Get a good air pressure gauge, if you get just a tiny bit serious about MTBing you’re going to start playing with tire pressure. A couple psi can make your tires sticking or not. Get a good gauge, I highly recommend the Topeak Smartgauge D2, it’s accurate, flexible and easy to use. An Amazon best seller, here’s a link 👉 Topeak Smartgauge D2
- Carry a multitool with you on every ride. I’m serious, most of the time you can MacGyver something to get back to the trailhead if you have a multitool. I’ve got the Crank Brothers M19, it’s worn, rubbed and abused – but it still works. Thousands sold on Amazon – check it out with this link 👉 Crank Brothers M19
What Bag Do I Recommend?
I recommend the EVOC Bike Travel Bag. (Link to AMAZON for price and Reviews) It is an appropriate size that is accepted on airlines, or via BikeFlights, but it is also large enough that you don’t have to unscrew every single bolt on your bike to make it fit.

It’s light and its wheels make it easy to drag throughout all terminals of the airport when you get dropped off too far away from your check in counter. It secures your bike well and it’s easy to use. I’ve been using this bag for almost 6 years now. Stay tuned for another article detailing this bag.
Where Can I Get A Box?
The best place to get a box for shipping a bike is at your local bike shop. If your local bike shop is currently receiving or building new bikes they might be willing to just give you the old box or sell it to you for cheap.
If your local bike shop doesn’t have any boxes, I highly recommend calling around to other bike shops and trying to find one through that route. If you still can’t find one, you can buy one through FedEx but it likely won’t be bike specific or will be more expensive.
How Does BikeFlights Work?
BikeFlights is a semi-new and revolutionary way to travel with your bike. BikeFlights works with FedEx to ship bikes quickly and at the least expensive price possible.
In order to ship a bike using BikeFlights, you go to their website: www.bikeflights.com. You will be prompted to determine what case you are shipping your bike in, where you are shipping to, and how quickly you need your equipment. Often times there will be an option for less than $60!
After you pick your bike’s travel plans, you will print out your shipping label. You can even pick whether you want your bike picked up at your house (for an additional fee) or if you want to drop your bike off at a local FedEx.
The benefit of shipping through FedEx is that it is likely the least expensive way to ship your bike. You can also track your bike’s progress through a tracking number and it is less likely to get lost than on an airline. The only downside of using BikeFlights is that you will need to give up your bike for a few days as it travels to your destination ahead of time to meet you.

Selecting Mountain Bikes for Teenage Boy Adventurers
Shopping for the best mountain bikes for a teenage boy can be challenging. While teens…

What is the Best Mountain Bike for the Money? (Cheap MTB)
Beginner mountain bikers always ask, “what is the best mountain bike for the money?” Of…

How Much Is a Bike Tune Up? (Plus Some DIY Bike Maintenance Tips)
If you’re a sporting enthusiast (and live in an area with seasonal weather changes), there…

The Best Trek Mountain Bike for the Money
The best Trek mountain bike for the money can be challenging to find. The reason…

Repair Old Bike or Buy New One – Here Are Your Options
Bicycles have a long lifespan; with a bit of maintenance, you can breathe a new…

How Much Does It Cost to Rent A MTB? Standard Costs Across the USA
I, too, wondered how much it costs to rent an MTB, except that I wanted…
Can You Ship With FedEx or UPS?
Yes, you can, but if you do you are clearly a novice bike traveller. I don’t see any reason why you would ship your bike through this outlet. It is the most expensive and least caring of all bike options. Not only will it cost you an arm and a leg, but they won’t treat your bike as previous cargo.
I would always ship my bike through FedEx or fly with it on the plane.
What Airlines Should I Fly My Bike On?
You can fly your bike on almost any airline- for a price. Some airlines are more accommodating than others. It would be impractical to go through each airline and detail their bike restrictions, however, you can easily find their information online. Bike restrictions are usually under oversize baggage or sporting equipment. Here are the top airline options:
Southwest: If you are flying domestically, Southwest is in the top tier of airlines to fly your bike on. They charge $75 for a bike. There are no surprises and no extra fees. Pus, on Southwest, 2 bags fly free.
Alaska: Alaska rivals Southwest for airline bike transport. They charge $75 for a bike. If you can manage to fit your bike into a smaller bag and keep it under 50 lbs then it will only be $25. They do require you to pay for your extra bags though.
United and Delta: United and Delta will both charge you $150 for bike transport. In my experience, United employees are less familiar with bike costs. Sometimes I am not charged for my bike and sometimes it’s charged as only a bag. I must admit that I cross my fingers every time I go to the United counter. Technically, it’s $150, though.
What Else To Put In Your Bike Bag:
If you are already paying the $75 or $150 fee for an “oversized item” on the airline, why not get your money’s worth. I have some specific items that I always like to throw into my bike case for the travel.
If I’m only travelling with a carry-on then I will pack my tools in my bike bag. Make sure your tools are in a double bag and then weighted down with a softer item like a jacket. You do not want your tools getting loose and hitting your frame in transit.
Next, I will pack any of my big and bulky jackets in my bike bag. They take up too much room in a suitcase, and in my bike case they double as extra padding for my bike.
Finally, I pack all my ‘extras’ in my bike bag. These are items that I would leave if I didn’t have the extra space in my bike bag. I might pack an extra helmet, extra pair of shoes, and of course, an extra water bottle or two.
Looking for Some More Ways to Help Your Bike Last
- Regular maintenance will keep you pedaling for years. Read – DIY Mountain Bike Maintenance Schedule
- Everyone wants a new bike, find out when it’s time to buy with this article: Repair Old Bike or Buy New – Options
- DIY Mountain Bike Tune Up – A Complete guide to what to repair and how.
Never Stop Jet-Setting
There are so many beautiful places to ride your bike, don’t let the seemingly daunting task of travelling with a bike stop you from enjoying the wonders out there.
That is one of the beautiful things about the sport of mountain biking, every trail is different and every location has different terrain. Not only will travelling with your bike give you fresh and exciting routes, it will certainly make you a well-rounded cyclist.

Hannah Finchamp is a professional mountain biker for the Orange Seal Pro Team. When she isn’t riding her own bike she is coaching others to reach their goals as a Certified USA Cycling Coach and Certified Athletic Trainer. To learn more about the author please visit www.hannahfinchamp.com and follow Hannah on Instagram https://www.instagram.com/hannah_finchamp/?hl=en