
There are a lot of things you take for granted about how a mountain bike works, things you don’t even notice or appreciate until something goes wrong. Take the rear derailleur, for example.
How many of us casual, recreational mountain bikers think about our rear derailleur…until we sideswipe a boulder at high speed two miles into a downhill ride and can’t shift the rear gears the entire ride? And then, just to add insult to injury, a headwind pops up on that return climb, bringing with it cold, slanting, spring rain.

Just a hypothetical situation, of course. Nothing that happened to me personally on my miserable ride last weekend.
When it’s time to fix anything on a bike the first thing we think about is how much is it going to cost?
If you take your MTB into a local bike shop the average price to replace a rear derailleur is going to be $110. If you DIY replacing a derailleur will cost about $50 (plus your time) This price will depend a lot on the actual derailleur needed. Usually a bike shop will also take care of other problems.
So, let’s dig into this subject: What is a rear derailleur on a mountain bike? And – for our hypothetical mountain biker – how much does it cost to replace a rear derailleur?
What Is a Rear Derailleur and How Does It Work?
At the risk of being too elementary for our readers who are already well-versed in mountain bike derailleurs, I’m going to start very basic. If you have a mountain bike with gears (not a fixed gear or single speed), you’ve probably noticed you have two sets of gears on your mountain bike: the front gears (operated by some style of shifter on the left handlebar) and the rear cassette or gear stack on the rear wheel (operated by the shifter on the right handlebar).
To switch between your mountain bike gears, you engage the shifter, which pulls the shifter cable, which in turn, pushes or pulls your derailleur in line with the gear you want to shift to. The derailleur then guides the chain into that specific chain ring. In short, the rear derailleur is the device that allows mountain bikers shift between their rear gears.
When it comes time to find the “correct” MTB rear derailleur, I’d suggest reading this article – Which Derailleur Hanger Do I Need?
Front derailleurs and rear derailleurs look (and operate) very different though they serve the same function. While the rear derailleur hangs down from the frame, roughly parallel with the spokes of the wheel, the front derailleur is bolted to the frame, more or less in line with the crank arms.
Thus, the rear derailleur is much more susceptible to damage – at least in my personal experience. It’s a very thin piece of metal that dangles next to the wheel without any protection. Heck, I’ve bent my rear derailleur just loading my bike on the rack!

While there are a variety of styles of rear derailleurs for mountain bikes, most function similarly – and they all serve the same purpose. There can be a range of prices for replacement derailleurs, starting around $20 and going all the way up to $700.
Read learn more about how mountain bike derailleurs work.
MTB Tools I Love and Recommend

I own each of these tools and only recommend things I own and use.
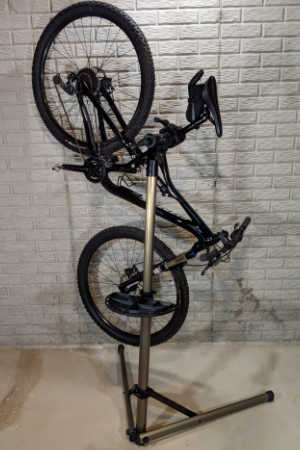
- Bike Hand Bike Repair Stand. Nice mountain bikes don’t have a kick stand so keeping your MTB safe but conveniently stored is essential. I keep my bike on my stand whenever I’m not riding it. This makes it easy to lube the chain, inflate the tires and adjust the derailleur. Highly recommended – Bike Hand Bike Repair Stand (👈 Link to Amazon to see what thousands of others have said)
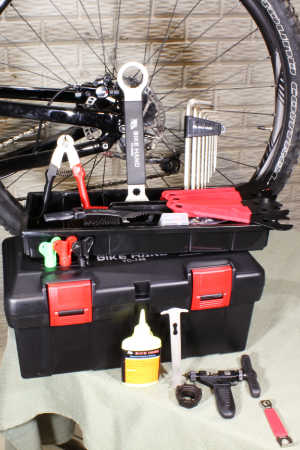
- A basic MTB toolbox for replacing a chain, adjusting brakes and dialing in the fit. Bike Hand has a 37-piece box that has most of the specialty bike tools to keep your MTB properly maintained. The Bike Hand brand is value packed for the avid rider. Check out the competitive prices with this link to Amazon 👉 Bike Hand 37 pcs Bike Repair Tool Kit
- Get a good air pressure gauge, if you get just a tiny bit serious about MTBing you’re going to start playing with tire pressure. A couple psi can make your tires sticking or not. Get a good gauge, I highly recommend the Topeak Smartgauge D2, it’s accurate, flexible and easy to use. An Amazon best seller, here’s a link 👉 Topeak Smartgauge D2
- Carry a multitool with you on every ride. I’m serious, most of the time you can MacGyver something to get back to the trailhead if you have a multitool. I’ve got the Crank Brothers M19, it’s worn, rubbed and abused – but it still works. Thousands sold on Amazon – check it out with this link 👉 Crank Brothers M19
3 Common Problems with Mountain Bike Rear Derailleurs
- The most common problem with a rear derailleur is when it gets bent. (This is different from when the derailleur hanger gets bent, which is actually the most common problem mountain bikers will face with derailleurs. This damage is so common, that rear derailleur hangers are more or less disposable – cheap and easy to replace.) If the rear derailleur itself gets bent, you won’t be able to shift gears properly because the chain won’t line up to drop into the gear rings. Most bikers do attempt to bend the derailleur back to its original position as a first course of action. However, only about one in a million actually find this successful. While it may even be moderately functional, more likely, your rear shifting will never be quite right.
- The second most common problem with a rear derailleur is when the pulley wheels break or wear out. They’re just little plastic wheels and are easy to break or wear flat over many miles of riding. Usually, they’re fairly easy to replace. However, if you have a cheap bike and cheap rear derailleur, it may be faster and better in the long run to just replace the entire derailleur.
- Another common problem with rear derailleurs is with the shifter cables. Over the life of a mountain bike, you’re usually more likely to replace cables and housing more often than the actual derailleur. When the cables get stretched, your shifting fails. The barrel adjusters on the shifters allow for easy adjustments to the cable tension if the cables aren’t too stretched to be useful. Once they get that worn out – or frayed or rusty – it’s time to replace the cables. Fortunately, this is a cheap and easy bike repair.
How Much Does Cost to Replace Your Mountain Bike Derailleur: Do It Yourself?
Replacing your rear derailleur is one of the easier repairs you can attempt yourself. The actual replacement of the derailleur is simple. Typically, you’ll spend more time indexing the shifting and setting the limit screws properly, which is actually a derailleur adjustment.
First, you’ll need to determine which parts you actually need to replace: derailleur, cables and/or derailleur hanger. If only the derailleur hanger (the small metal piece that connects the rear derailleur to the mountain bike frame) is bent or broken, you’ll be able to use the same derailleur and just replace the derailleur hanger. Similarly, you may be able to continue using the same hanger bracket if only the derailleur is bent. A bad crash may require replacing all rear shifting components. But often, you can keep the same shifter cables if they’re in good condition.
Price range for derailleur hangers on Amazon: $6 to $20
Price range for derailleurs on Amazon: $20 to $1,000. Yikes! (Yes, really – but it is for an electronic shifting system with battery and charger.)
Buying mountain bike shifter cables usually costs $4- $20 with a similar price for the cable housing. Often, you can save money by buying cables and housing together in a kit.

Wondering What Derailleur Hanger You Need? (Look No Further)
If there’s one part on my bike that I took for granted in my first…

How Much Does it Cost to Replace a Mountain Bike Rear Derailleur?
There are a lot of things you take for granted about how a mountain bike…

What is a Mountain Bike Rear Derailleur Hanger and How to Fix it
After taking a tumble my bike wasn’t shifting correctly. At the bike shop the tech…
How Much Does Cost to Replace Your Mountain Bike Derailleur: Bike Shop?
The cost of labor for bike mechanics varies depending on your area, but replacing a rear derailleur on a mountain bike shouldn’t take more than a half hour for a bike repair professional. My local shop charges about $30 for the labor, plus the cost of whatever parts you decide on. Figure between $30 and $90 per hour for a local bike shop to work on your bike.

Additionally, you’ll save on the cost of labor if you have the derailleur replaced as part of a bike tune-(link to tuneup article) or other repairs you’re already having performed.
If you’re lucky (or smart) and have a good relationship with your local bike shop, they’ll help you pick a replacement derailleur that suits your budget and your bike without trying to upsell. Many bike shops have used parts they’ll sell you at a fraction of the cost of a new derailleur. Some cities and communities even have bike co-ops where you can trade parts, find used parts and even have a place to do your repairs and learn bike mechanic skills. For example, the Bicycle Resource Center in Santa Fe, New Mexico (which I was involved with starting in the early 2000s).
Should I Upgrade My Rear Derailleur?
I have a biased – but also very pragmatic – view on this: NO!
Higher end rear derailleurs boast features like astronaut-level lightweight and sealed bearings. While somewhat cool, these derailleur upgrades won’t add $500 worth of improvement to your riding. Save that money for upgrades that make a noticeable difference.
If your rear derailleur works well, don’t replace it. If it’s broken, then you might consider getting a nicer derailleur when you replace it. Since rear derailleurs are so easy to damage, look for products that emphasize sturdiness and ease of adjusting over light weight.
If you’re interested in switching to an electronic shifting system, this will require more than just a derailleur upgrade. As you’ll have to replace every element of your front and rear shifting, that upgrade is more than what this DIY article covers.
How to Care for an MTB Rear Derailleur
- Keeping the shifter cables lubricated and the chain lubricated will actually help prolong the life of your derailleur by making shifting smooth and requiring less force.
- Put a drop of lube into the limit screws whenever you do a tune-up or a derailleur adjustment.
- During tunes or bike washing, clean the derailleurs of mud, dust and grease buildup, especially the pulley wheels which usually accumulate a layer of gunk.
- Wash derailleurs (as well as all other parts of the bike) after muddy or wet rides.
- Adjusting the cable tension and limit screws appropriately will minimize wear and tear on your derailleur.
- Most important: make sure the rear derailleur limits are set to keep the derailleur out of the wheel. There’s no faster way to destroy a rear derailleur than to shift it into the spokes of a spinning wheel because you forgot to set the limit screw. It’s also a great way to have a spectacularly gratuitous crash – usually in the trailhead parking lot while everyone is looking. Just speaking hypothetically, of course.
Learn more about Pedals, Handlebars and Brakes
- Handlebars on MTBs are wide, find out why – Why are MTB Handlebars so Wide?
- Should you upgrade your handlebars? Read – Are Handlebars Worth Upgrading?
- Universal pedals? Read all about it here – 9 Universal Pedals for Your MTB
- Learning how to Jump? Learn more with – How to Jump a MTB with Flat Pedals
- Keep your disc brakes clean – How to Clean Mountain Bike Disc Brakes
- Is their a difference? – Mountain Bike V-Brakes vs Disc

Professional writer Kat Jahnigen was 2 miles from the nearest village – and roughly 2,310 miles – from the nearest English-speaking town – when her bike tire burst. At that time, she was a college student on a bike trip across the desolate, rocky island of Crete. It suddenly occurred to her that it would’ve been good to learn some basic bike repairs before setting off on a solo bike trip.
Check out Kat’s website WriteHire at writehire.net.