
There’s nothing more annoying than riding your bike, and your seat keeps sinking lower and lower with every bump, making you feel uncomfortable. But don’t worry; I’ve got the perfect solution for your sinking seat issues.
When your bike seat won’t stay up, it usually means you need to clean and reinstall the seat post clamp hardware and seat post mounting. No worries, I’ll guide you through the basics of repairing a bike seat that won’t stay in place. Stick with me, and we’ll have you riding comfortably in no time.
First, let’s understand the mechanics and reasons why a bike seat might not stay in place. Trust me; it’s quite simple.

Understanding Your Bike Seat
There are three main parts you need to know about when it comes to your bike seat:
- The bike frame – This is where the seat post inserts and where the hardware that keeps it secure is located.
- The seat post – This is the tube your seat attaches to, which then connects to the bike frame.
- The seat – Underneath most bike seats, you’ll find two rails and a clamping assembly. The clamping assembly typically has a rounded nut and a rounded holder that clamps over both seat rails. When loose, you can slide the whole assembly along the rails, usually about 2 inches or so, which lets you adjust the seat forward or backward.
The rounded nut allows you to set the angle at which the seat mounts to the seat post. The entire underside assembly mounts to the seat and seat post with a round clamp. The hardware usually consists of a squared and threaded shaft with a nut on either side of the assembly. So, you’re really just dealing with two nuts you need to tighten.
Just a quick note: if the rounded clamp on the underside of the seat isn’t seated correctly, it can tighten up, then pop into a groove and become loose again. So, make sure it’s properly seated together when you’re tightening it.

Why A Bike Seat Won’t Stay Up
Bike seats won’t stay in place for one of a few reasons, but usually, it’s due to loose hardware. However, there are some specific situations I’d like to share, so you can ensure you’ve got the correct fix. Let’s look at symptoms and how to deal with them.
There are two common issues with bike seats not staying put:
- A bike seat tilts forward or backward (the nose of the seat won’t stay up), but the seat post stays in place.
- A bike seat remains firmly in place to the seat post, but the seat post and seat sink into the bike frame.
The first one happens because of loose seat hardware. That is the hardware under the seat with the rounded mount and the two nuts on either side. I mentioned it in the beginning when talking about how a bike seat works, so if you skipped that, it’s best to jump back and read it real quick.
Sometimes you’ll find the two nuts under the seat become stripped. I’ve seen this happen to cheaper bike seats, like the ones you’ll find on most bikes under $500. When they become stripped, you’ll need a new seat.
The second reason a bike seat won’t stay up is due to looseness in the clamp on the bike frame holding the seat post. These clamps can become worn over time, and they also come loose from riding too. You can tighten the hardware, but it might come loose again. So, I’ve got some other great ideas to help you to ensure that the bike seat and post stay in place.
How To Keep Your Bike Seat in Position
I’ve had a lot of experience fixing bikes. I’ve fixed all kinds, and I can tell you that the seat post sinking in the bike frame is a common problem. Here are a few things you can do to fix the issue.
What You’ll Need:
- Soap and warm water
- Shop paper towels
- Emery cloth
- Compressed air
- Thread locking fluid
- Goggles for safety
- Dust mask for safety
Steps:
- Loosen the seat post hardware so you can get the seat in the correct position. I’ve got an article on proper seat height and place, so check that out if you want to do things right. Otherwise, just try to get the seat at a comfortable height.
You should be able to touch the ground with the ball of your foot but not the heel (mountain bikes, anyway). Your leg should be nearly straight, with only a tiny bend when the pedal is all the way down.
Get your seat in that position and either mark the seat post with a marker or, even better, put some masking tape on it to mark the height you want. - After marking the height, remove the seat post and seat from the bike frame.
- Inspect the hardware. If the bolts and nuts are worn, replace them. Many bikes come with quick-connect bolts. Ensure nothing is worn or threaded, and set the hardware aside. Oh, if the threads are oily at all, clean them.
- Put on your safety goggles and a dust mask.
- Clean both the bike frame (where the seat post goes in) and the seat post. Use mild soap and water and ensure zero oil, grease, or dirt on either part. Dry thoroughly with heavy-duty shop paper towels – they won’t leave bits behind like household paper towels.
- Using your emery cloth, gently sand around the masking tape, where the seat post will go into the bike frame. You’ll want to sand about 2” of the post from the masking tape marker. You don’t need to sand the whole thing.
- Carefully use your finger and sand the inside of the bike frame clamp that will hold the seat post.
- Put on your safety goggles.
- Using your compressed air, blow off the seat post and the inside of the bike frame, which you just sanded with emery cloth. The dust will be fine, so wear your personal protective equipment.
- Reinstall the bike clamp hardware, but add a little thread locker on the threads before you do it up. That will help to prevent loosening.
- Reinsert the bike post/seat into the bike frame. Tighten down the hardware when you have the bike post at the position you marked before with masking tape.
- Tighten the hardware, but don’t overtighten. A precision torque wrench is best, but if you don’t have one, just tighten it well, but don’t put your weight into it, if you know what I mean. You don’t want to de-thread it, but you don’t want it loose.

That’s it! That’s the master class version too. Seriously, there’s really not much to these things, as you’ll see. The concept is to clean off any oil and buff the surface so it’s rough for a good, firm clamp-down on the seat post.
You can always touch it with some paint, too, as some people might be concerned about removing the paint. However, if you look inside the bike frame, no paint is usually inside.
If your bike seat post and (or) frame are made of steel, scuffing up the seat post can lead to rusting. However, the bike frame/seat post clamp will do that anyway. Many budget bikes use a chrome-plated steel seat post. These cheap seat posts rust relatively easily, so if you have to scuff one up, it’s best to touch it up with some Tremclad or other metal paint.
MTB Tools I Love and Recommend

I own each of these tools and only recommend things I own and use.
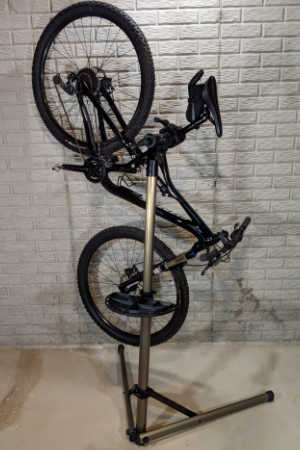
- Bike Hand Bike Repair Stand. Nice mountain bikes don’t have a kick stand so keeping your MTB safe but conveniently stored is essential. I keep my bike on my stand whenever I’m not riding it. This makes it easy to lube the chain, inflate the tires and adjust the derailleur. Highly recommended – Bike Hand Bike Repair Stand (👈 Link to Amazon to see what thousands of others have said)
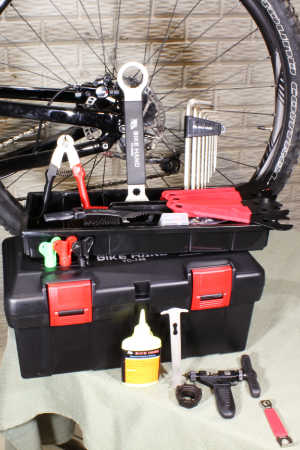
- A basic MTB toolbox for replacing a chain, adjusting brakes and dialing in the fit. Bike Hand has a 37-piece box that has most of the specialty bike tools to keep your MTB properly maintained. The Bike Hand brand is value packed for the avid rider. Check out the competitive prices with this link to Amazon 👉 Bike Hand 37 pcs Bike Repair Tool Kit
- Get a good air pressure gauge, if you get just a tiny bit serious about MTBing you’re going to start playing with tire pressure. A couple psi can make your tires sticking or not. Get a good gauge, I highly recommend the Topeak Smartgauge D2, it’s accurate, flexible and easy to use. An Amazon best seller, here’s a link 👉 Topeak Smartgauge D2
- Carry a multitool with you on every ride. I’m serious, most of the time you can MacGyver something to get back to the trailhead if you have a multitool. I’ve got the Crank Brothers M19, it’s worn, rubbed and abused – but it still works. Thousands sold on Amazon – check it out with this link 👉 Crank Brothers M19
Tips For Keeping Bike Seats in Position
Bike seats and posts are notorious for coming loose. However, you can do some proactive things to prevent this from happening. Here are a few tips to keep things working correctly for you.
1. Keep It Clean
It’s essential to keep your bike clean. Not only can dirt and debris affect your chain and gears, but they can also affect your seat and seat post. Here is the most
common issue I’ve seen concerning dirty seat post issues: First, dirt in the seat post clamp can scratch the point on chromed seat posts. Similarly, one might tighten down a seat post on dirt, and it might seem tight. That is until you ride it, and the vibrations and force crush the dirt particles, causing a loosening of the hardware and sinking seat.
Another common issue is getting over-excited about oiling a bike. If you oil your bike but get oil on the seat post or seat post clamp or nut, you’ll find you’ve made conditions worse. I recommend cleaning the seat post and frame (where the seat post inserts) to remove all oils before installation.

2. Inspect and Tighten Before Each Ride
You might not know it, but a bike that ‘just sits there’ is slowly getting loose over time. Unless nuts are thread-locking nuts (nylon insert type) or use a thread-locking fluid, they will likely come loose over time. It is pretty prevalent with budget-tier bikes that use softer, cheaper metals in their production. Even high-end bikes can fall prey to loosening over time, so before you ride, it’s best to give the bike a quick once-over to ensure everything is safe and proper before your adventure begins.
Looking for Some More Ways to Help Your Bike Last
- Regular maintenance will keep you pedaling for years. Read – DIY Mountain Bike Maintenance Schedule
- Everyone wants a new bike, find out when it’s time to buy with this article: Repair Old Bike or Buy New – Options
- DIY Mountain Bike Tune Up – A Complete guide to what to repair and how.
David Humphries is the creator of DIY Mountain Bike. For me a relaxing day involves riding my mountain bike to decompress after a long day. When not on my bike I can be found wrenching on it or making YouTube videos at 👉 DIY Mountain Bike Read more about David HERE.
Sources and More Reading
- Park Tool: Repair Help – Saddle and Seatpost Service URL: https://www.parktool.com/blog/repair-help/saddle-and-seatpost-service
- Sheldon Brown: Seatpost Adjustment URL: https://www.sheldonbrown.com/saddles.html#height
- Bike Forums: How to Keep a Bike Seat from Slipping URL: https://www.bikeforums.net/bicycle-mechanics/1162593-how-keep-bike-seat-slipping.html