
Unless you’ve spent your life trapped in a cave, you’ve seen a Schrader valve on a car or bike tire. You may have a wheelbarrow with an inflatable tire with a Schrader valve tube. The point is that Schrader valves are the most common valve type, but do you know how they work?
Schrader valves have been around for over 130 years and are the most popular type of air valve. Schrader valves are used on everything from car tires to your common bicycle.
In this article, I’ll dive deep into the Schrader valve, its history, how it works, and even why high-end bikes don’t use them, even though they’ve stood the test of time. Stick with me, and I’ll share a few tricks I have for inflating and deflating too. Let’s get started.

Understanding Schrader Valve Tubes
Inner tubes for your mountain bike come in various sizes, some with included sealants and some made out of materials other than rubber. The one thing you need to pay attention to first is the valve stem.
As mentioned, the most common valve type is the Schrader valve. Schrader valve tubes are, by extension, the most popular, and most commonly utilized inner tube valve type.
Schrader valve tubes utilize a Schrader valve embedded in the tube itself. However, that does not mean you can’t fix a valve if it’s leaking. Let’s talk for a moment about how a Schrader valve assembly works.
Schrader valves have two primary components, the outer sheath and the inner core. Most people don’t know this, but you can remove and replace the core. However, most people never attempt core replacement due to the cost of budget inner tubes that include the built-in Schrader air valve.
Although Schrader valves are the most common, they are not the only form of air valve you’ll come across. In fact, two other valve types are also common, depending on where you look.
Let’s briefly examine the different valve types and consider how they differ from the standard Schrader valve. After all, you don’t want to inadvertently buy a Presta valve tube if your bike and pump are set up for Schrader valve tubes.
Schrader Valves vs. Presta Valves vs. Wood Valves: Differences and Benefits

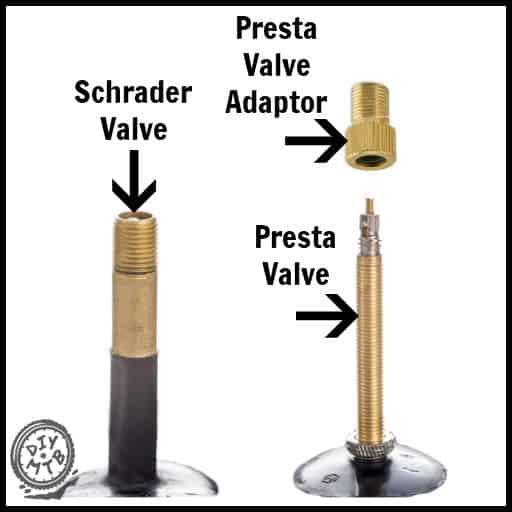
If you walk into a high-end bike shop, you’ll quickly notice that most high-end bikes use an air valve slimmer than the traditional Schrader valve. Furthermore, the Schrader valve typically has a rubberized coating on the outer sheath. In contrast, the Presta valve typically appears threaded for the entire valve stem length.
Presta valves are not only slimmer than Schrader valves but they are also known to have a better seal. That is, Schrader valve tubes are known to leak. Riders typically don’t worry so much about it and accept having to check tire pressure and refill it regularly.
Presta valves differ from Schrader valves because they have a slightly smaller core and a lock nut on the air-release stem. In contrast, Schrader valve tubes have no lock function on the valve release stem. So, if debris is inside the air cap when you install or reinstall it to the valve, it’s pretty easy to let the air out of your tire accidentally.
Due to the extra step of loosening the valve core stem locking nut before you can depress the stem, you’ve ensured a better or more protected seal.
Stem locking nut features aside, Presta valves are known to be better quality than Schrader valves. That is not to say you won’t be able to find a budget-priced Presta valve tube.
In case you weren’t bombarded with enough information on the Presta and Schrader valve tube concepts, you may come across a third type of air valve. However, it’s more common in parts of Europe than in North America, the Dunlop Valve.
Dunlop valves are also known as Woods valves. They are slim, like the Presta, and have a small end, similar to the Schrader. They are common in countries like Holland, but in the USA or Canada, you won’t see them very often at all.
You’ll need a small adapter to use either a Presta or a Dunlop valve with an air pump setup for a Schrader.
Benefits and Limitations
Schrader valve tubes are the recommended go-to for tubed tires. They are the most common and, therefore, the most readily available. Furthermore, if you need air in your tube, you can use any gas station air pump because car and truck tires use the same valve type.
Limitations to the Schrader valve include two primary considerations. First, Schrader valves are heavy. That might not matter to you, but weight is a big deal to those of us who race or ride competitively, so the Presta valve wins here.
Furthermore, Schrader valves tend to have a slow leak. Although the core is replaceable, the cost of replacing the entire Schrader valve tube means that using these valves is akin to wastefulness. After all, you’re going to throw out an entire inner tube because of a tiny valve in the valve stem? It seems wasteful to me.
Presta valves are lighter than Schrader. Furthermore, as mentioned, Presta valves tend to leak less than Schrader. It might be because they have the locking nut on the air release stem. Or, it could be that Presta valves are generally better quality than Schrader, so the valve has a higher degree of accuracy.
The downside to Presta valves is that you must carry a small adapter if you have a pump set for Schrader valve tubes.
Dunlop or Woods valves are okay. Being a North American, I don’t have much experience with them, but that is not to say these valves don’t do their job. I’m merely pointing out that these are the rare, least standard valves you’ll find in North America, so I don’t tend even to consider their existence when looking for inner tubes or replacement valve cores.

Choosing A Valve Type: Applications of Schrader Valve Tubes
Okay, so you know you must choose, but do you go for the Schrader, now that you know the Presta is ever-so-slightly better?
Schrader valves are the most common. You’ll be hard-pressed to find an air pump that can’t fit a Schrader. And really, are they that bad if they are good enough for the automotive industry?

From my research and personal experience, I can tell you that Presta valves seem to have better machining than Schrader valves. Furthermore, they are acclaimed for their lightweight in comparison. Just how much weight are we talking about?
A Presta valve on Amazon allegedly weighs 0.634 ounces (set of 2), whereas a Presta tube comes in at 171 grams. Schrader valves allegedly come at more than 20 grams per valve. However, I’m not certain that’s entirely accurate because I’m unsure if the manufacturer is considering the packaging weight in their estimation.
Dollars to donuts, the Presta valve is better. Still, according to Wikipedia, the Schrader valve comes in at as much as 4-5 grams more than a Presta.
You can probably tell by now that I ride using Presta valves. In fact, I don’t even use tubes on my main XC MTB. However, that’s not the case with my mudder or beater bikes. I run with Schrader valve tubes for both. I’ll explain the applications so you know what I’m talking about.

My ‘mudder’ is my mountain bike for semi-downhill runs through areas that might encounter mud, muck, or generally wet conditions. I’ve often found hidden obstacles in the muck, so I use sealant and inner tubes for the scenario.
Further to my last point on the use case, I also have my ‘beater’ mountain bike. It’s a cheap bike, and I don’t mind beating it up, hitting curbs, riding in the city on short distances, or generally smashing it around without worrying about breaking it. After all, it’s meant to be the bike I don’t care about.

Why would I have a bike I don’t care about? Because where I live, you leave a bike outside. It’s gone in minutes. There’s broken glass here and there, and I don’t want to ride my favorite mountain bike in these conditions. So, I have a beater bike that can be tossed around, left outside with a lock. My good bike enters the house, and I take it to trails like single-track and other fooleries.
The point of my story is to point out that everything has its place. If you have a bike that uses inner tubes, then by all means, use the inner tubes that suit you. I just like to consider weight and quality when it comes to parts for my favorite bike.
MTB Tools I Love and Recommend

I own each of these tools and only recommend things I own and use.
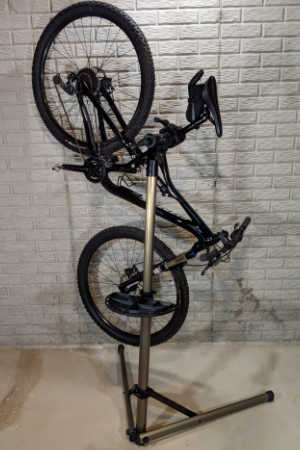
- Bike Hand Bike Repair Stand. Nice mountain bikes don’t have a kick stand so keeping your MTB safe but conveniently stored is essential. I keep my bike on my stand whenever I’m not riding it. This makes it easy to lube the chain, inflate the tires and adjust the derailleur. Highly recommended – Bike Hand Bike Repair Stand (👈 Link to Amazon to see what thousands of others have said)
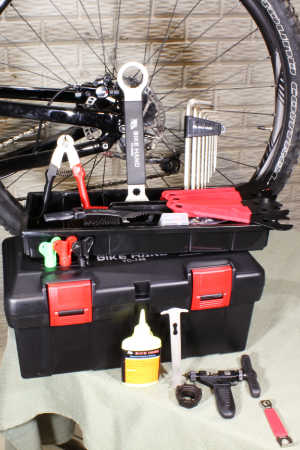
- A basic MTB toolbox for replacing a chain, adjusting brakes and dialing in the fit. Bike Hand has a 37-piece box that has most of the specialty bike tools to keep your MTB properly maintained. The Bike Hand brand is value packed for the avid rider. Check out the competitive prices with this link to Amazon 👉 Bike Hand 37 pcs Bike Repair Tool Kit
- Get a good air pressure gauge, if you get just a tiny bit serious about MTBing you’re going to start playing with tire pressure. A couple psi can make your tires sticking or not. Get a good gauge, I highly recommend the Topeak Smartgauge D2, it’s accurate, flexible and easy to use. An Amazon best seller, here’s a link 👉 Topeak Smartgauge D2
- Carry a multitool with you on every ride. I’m serious, most of the time you can MacGyver something to get back to the trailhead if you have a multitool. I’ve got the Crank Brothers M19, it’s worn, rubbed and abused – but it still works. Thousands sold on Amazon – check it out with this link 👉 Crank Brothers M19
How to Install and Maintain Schrader Valve Tubes
Schrader valve tubes are easy to install. Here’s a step-by-step to walk you through it. Just follow my instructions, and you’ll do just fine.
Tools You Need
- You’ll need a new (or in good condition used) Schrader valve inner tube. It must fit the size noted on the sidewall of your bike tire. For example, 26 x 2.125 means a 26-inch diameter and a width of 2.125 inches.
- Naturally, having an air pump that fits your Schrader valve inner tube would be best.
- It’s best to have a tire lever or three. I say three because they are often sold in 3-packs. They are cheap and worth every penny.
- A bike wheel and tire (obviously)
- A bike stand (not necessary, but very useful)

Steps
- Secure your bike on a stand and remove the wheel you want to replace the tube.
- If the tire is inflated, let out the air. If it’s flat, we start by removing the cap on the air valve only.
- Using your tire wedges, remove the tire from the rim. Tire wedges slip under the tire bead, and then, using a prying motion, you force the tire bead to pop out of the rim. Good tire wedges have a hooked end so that you can hook a spoke, and it holds your wedge in place, so you can use a second or third wedge as needed.
- Slide the second wedge along, forcing more tire bead out of the rim until the tire ‘pops free’ of the rim.
- Repeat a similar process for the other side of the tire to remove from the same side of the rim, thus freeing the tire from the rim completely.
- Inspect and clean the inside of the tire. Ensure no debris (like sand or wood) is inside the tire.
- Inspect and clean the inside of the wheel rim. Again, ensure there is no dirt, sand, or debris, and the rim has rim tape covering all of the spoke nipples. Remember that once you inflate the inner tube, it expands inside the tire and rim, filling every crevice it can.
- Take your new inner tube and add just enough air to make it sort of mushy but able to hold a semi-shape. You don’t want too much air in it yet, but it won’t be easy to install if there is zero air in the tube. If you’re using a hand pump, we’re talking about just a stroke or three of the pump. In other words, I find it best to put just enough air in the tube to hold its shape and not a touch more.
- Put the tire back on the rim, but only one bead or side of the tire will be on the rim.
- Take your inner tube, and check the alignment of the valve stem hole in your bike wheel. Insert the inner tube into the tire and hold the tire in your hand like a sandwich. Guide the valve stem through the rim hole and hold the tire and bead in place on the rim with one hand.
- Take a tire wedge in your other hand and slide it in so it holds the bead where your hand was sandwiching the tire, holding it and the valve in place on the rim.
- Proceed using your wedges to pop the tire (with inserted inner tube) in place on the wheel rim. Be careful not to pinch the inner tube (that’s why we put some air in it earlier to avoid pinching it during tire-to-rim installation).
- Once the tire is installed, start filling the inner tube. When the tire gets semi-inflated, stop and squish the tire/tube around the rim to ensure a good seal of the tire bead on the rim bead, locking the tire in place.
- Proceed to inflate the tire to the recommended pressure. Don’t forget to put the valve dust cover back in place.
DIY MTB Pro Tip: I bought a bike valve core removal tool years ago, it’s made all the difference when installing tubes and repairing tires. Inexpensive and works great. Here’s a shortcut link to Amazon to check it out. 👉 Stan’s Valve Core Removal Tool
Schrader Valve Tube Care
Here’s what you need to know about caring for your inner tubes and their subsequent valves. First, a good-quality inner tube is made of rubber. Rubber will decompose over time, being a natural organic material. Rubber typically lasts about five years; then, it starts getting brittle, cracking, and breaking down.

The conditions to which rubber is exposed will dictate the longevity as much as the materials used in the inner tube’s construction. For example, you can get butyl rubber inner tubes, natural latex rubber inner tubes, and even thermoplastic polyurethane or TPU inner tubes (common in the road racing circuit).
Caring for your Schrader valve tube is easy if you follow my instructions for installation. A clean inner tire and wheel rim mean you are installing your inner tube in a clean environment. Further to that point, the best way to care for your Schrader valve is to keep it clean, and the dust cover on it at all times (unless inflating or deflating).

David Humphries is the creator of DIY Mountain Bike. For me a relaxing day involves riding my mountain bike to decompress after a long day. When not on my bike I can be found wrenching on it or making YouTube videos at 👉 DIY Mountain Bike Read more about David HERE.
More Reading
- Sheldon Brown’s Bicycle Technical Information: Website: https://www.sheldonbrown.com/ Sheldon Brown’s website is a comprehensive resource for bicycle maintenance and technical information. It contains detailed articles on a variety of topics, including Schrader valves, their uses, and how to service them.
- Park Tool’s Repair Help and Education: Website: https://www.parktool.com/blog/repair-help Park Tool is a leading manufacturer of bicycle repair tools and equipment. Their website features an extensive library of repair help articles and videos, including information on Schrader valves, how to use them, and how to repair or replace them.